Preparing Heirloom Lace & Washable Glue Trick by Hope Yoder
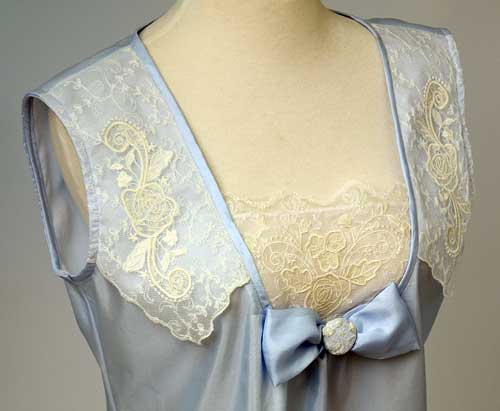
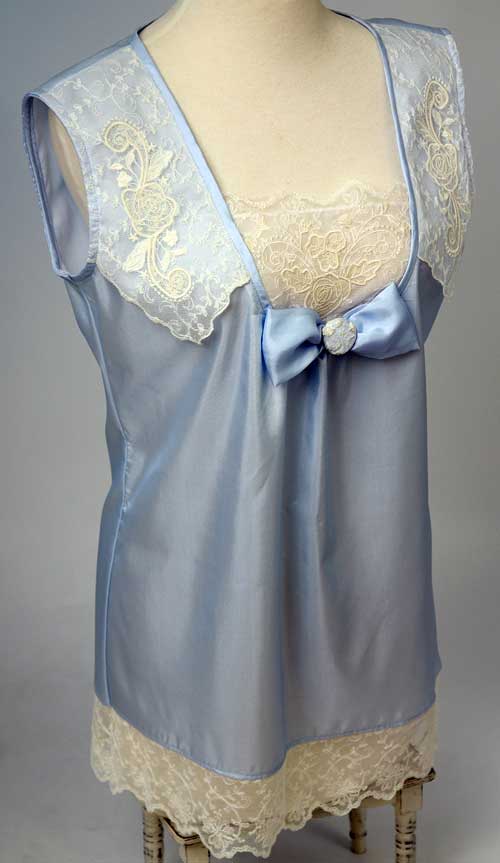
Many of you know that I travel across the I don’t normally visit chat rooms or sewing forums but a friend of mine mentioned that there was a lot of discussion about me on the Martha Pullen forum. I was curious so I searched the website and found several comments regarding my embroidery designs as well as some questions from Gayle who was trying to recreate my the blue batiste blouse project that I wrote for Feb 2007 Sew News magazine. I read the comments from the forum members trying to help her. Needless to say she received many different answers so I e-mailed her directly. Below I’ll share part of our e-mails as she thought others might find this helpful as well. Gayle was having trouble getting her heirloom cotton lace attached to the batiste fabric because she had wet the lace prior to insertion. Below is a small excerpt from the article. | ||
Excerpt from the Magazine Article | ||
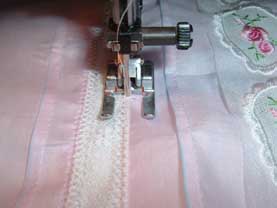
Pin the heirloom insertion lace along each line and lightly spray with starch. Use a 110 universal needle or a 100 Wing needle, 60 weight cotton thread and select an Entredeux or a Pinstitch to attach the lace. Place light weight tearaway underneath the fabric & attatch the lace to the base fabric. |
| |
Gayle: I think my mistake was in wetting (with water) the lace in the first place. The edges curled and I couldn't get them flat again without stretching the lace. So, after removing the lace from the blouse front, I pinned it to my lace shaping board with glass head pins, and, as you suggested, sprayed it with starch, pressed it dry, and started over. The edges weren't perfectly "uncurled" but much better. I aligned the edge of the lace with the line I had drawn with the blue wash-out pen (per the instructions), then stitched it… Hope: I normally starch my lace well and let it air dry before I use it. But I DO NOT iron the wet starched lace. | ||
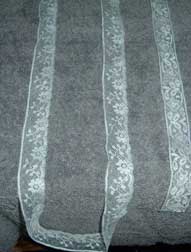
| I place a bath towel on my ironing board and lay the lace on the towel (you can make a loose wad of lace on the board) and then heavily spray the lace with starch. By heavily starching it I mean just make it slightly wet. | |
| Now take the lace and drape it over the ironing board so it isn’t wrinkled at all and let it air dry. If you have too much yardage of lace you can sling it over your shower curtain.
Once it’s dry then you can use it as described in the magazine instructions. | |
Use glass head pins to pin the lace to the fabric, stabbing the pins into a padded surface like a lace shaping board. Then I lightly starch the lace that is pinned down & press it dry so the lace slightly sticks to the shirt front. Make sure your iron is clean and use an up and down motion with the iron.
Another good trick if you are not going to cut the base fabric behind the lace - you can glue the lace down. This is a good beginner trick which I still use. Use Elmer's blue washable glue (a thin bead). Place the glue along the center of the lace or just inside the lace headings and let air dry. I never can wait for it to air dry so I place a cheap paper towel over the glued lace and press it dry with the iron. Remember this trick will only work if you aren't going to cut the fabric from behind the lace. | ||
Monday, May 11, 2009
Preparing Lace - & Washable Glue Trick


Bath Towel Skirt
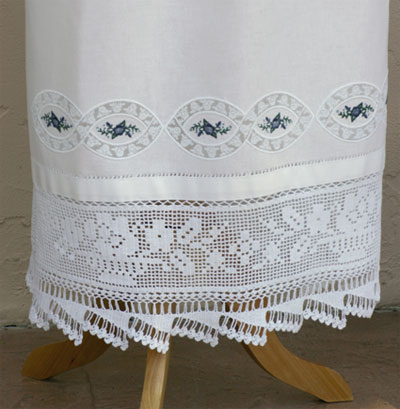
Making a Guest Towel Skirt by Hope Yoder
Hi Hope,
Can I just say how wonderful your designs are! I have never tried anything to adventurous but your Hearts and Bows are so easy if you read the instructions carefully. My question is, on your website there is another of your fabulous collections Lace Shaping Vol 3 which shows a lovely crochet skirt. Can you give me some hints for making this skirt?
Many thanks and best regards Sue from
Dear Sue, You will need 2 crochet bath towels http://allaboutblanks.com/Guest_Towel-Crochet-Wide-Lace.htm and no pattern at all. I used the "Scallop" design from the Lace Shaping Collection. The bath towels are completely finished on all 4 edges with a beautiful crochet deep hem so all you have to do is the pretty embroidery and then sew the two towels together at the side seams (which are already finished so all you need to do is straight stitch the seams) and then trim off any length necessary at the TOP of the skirt. Overcast the top edge and fold down to form a casing for an elastic band. I also put two darts in the front and two darts in the back to take up some of the fullness of the skirt. There is no need to do anything to the bottom as it is already finished with the pretty crochet edge.
Thank you for purchasing my Lace Shaping embroidery collection!
|

Christening Gown
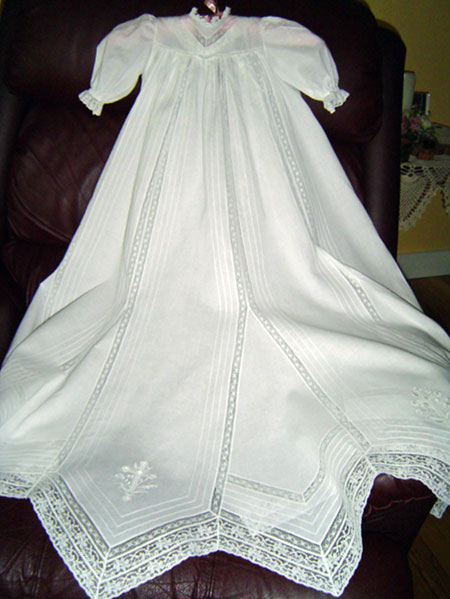
Anna's Christening Gown
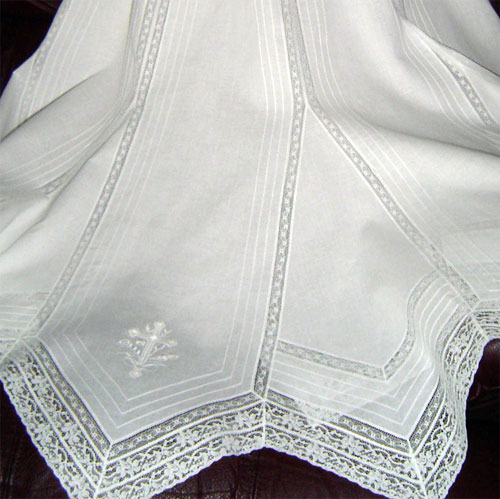
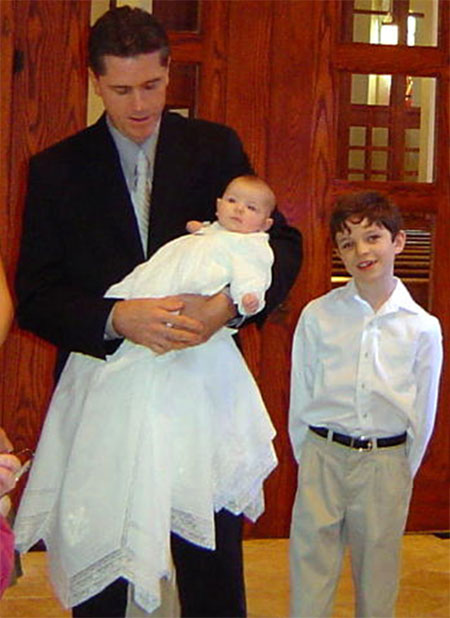
Dear Hope: When Anna was born I started looking through Martha Pullen’s Grandmother’s Hope Chest book and picked out the pattern with the drawing on page 144 and photo on plate XXXVI. I opted to use your cross design from “Heirloom Embellishments Lace Shaping” CD instead of the Swiss Motifs as pictured in the book. The pattern had 8 gores with 8 godets inserted between them at the hemline. After sewing the rows of pintucks on each gore, I embroidered the beautiful cross with white rayon thread and mesh water soluble stabilizer (Wet N Gone) on each of the starched gores inside the pintucks at the point. I left the godets plain.
After making the slip, I embroidered Anna’s name and birth date on the front of the slip and my own signature, relationship (Grammy) and date of creation on the back. I also made a matching “hanky-bonnet”. As a final touch I made a ribbon rosette from ribbon left over from making Anna’s Mom’s bridal veil and attached it at the point of the bodice chevron of lace. Anita’s Tip: For marking the embroidery placement, use a blue water-soluble marker instead of a blue pencil that is supposed to erase with water (as she had a very tough time getting the pencil out). (From Hope) Anita, I only use the blue water-soluble markers in heirloom sewing. You can use this marker and spray starch and press several times with an iron safely. The trick to using the marker is to wash it away with plain water (no detergent). Please do not use a purple “air-soluble” marker when marking & pressing. When I’m teaching classes I don’t even allow them in my classrooms.
|
Chenille Jacket
FREE Chenille Jacket Instructions by Hope Yoder.
| |
Embroidery Products | |
Embroidery |
|
Adding Chenille To apply the chenille, use a chenille foot (Viking & Pfaff machines) or an open toe foot with a tiny lightening stitch (zigzag set on 1.0 L & W) & follow these guidelines:
| |
Add the following layers of chenille to each jacket part:
|
|
Another jacket example can be found using Hope’s Romantic Hearts & Bows
| |


Nashville Lace Denim
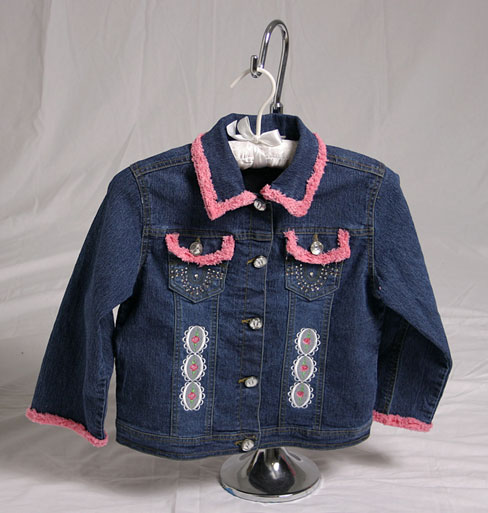
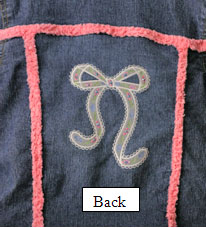
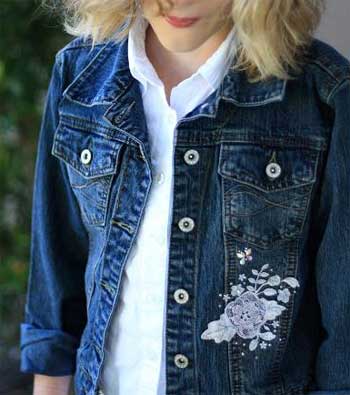
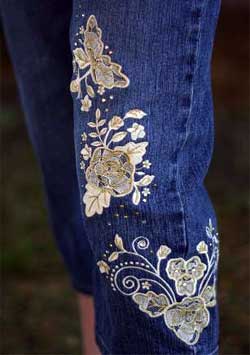
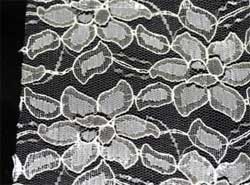
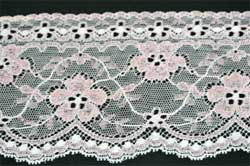
Re-Embroidered Lace
To achieve this hip look, substitute inexpensive lace that you can find in 45" wide in any fabric store. It is an all-over lace that comes in many different colors. Ivory lace & gold metallic threads have been used on the Capri jeans. Pink scalloped lace with silver metallic thread was used on the Jean Jacket. This was a 3" wide trim lace purchased at a sewing market years ago. Experiment with your scraps of lace or fabric to get different looks.
|
|
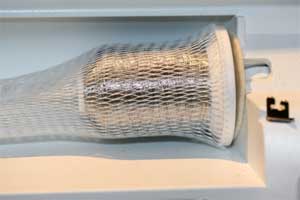
Freestanding Lace
These tips were given by Daleen from Stitch Delight.
Freestanding lace is an embroidery design that is stitched onto a special stabilizer that dissolves in warm or cold water, leaving you with the freestanding lace. Only designs digitized specifically for freestanding lace can be sewn in this way, other designs will fall apart when the stabilizer is dissolved. When you look closely at any fabric you will see the weave of the fabric which looks like a grid. Freestanding Lace designs need to be digitized to support this grid system to ensure that they don’t fall apart when the water soluble stabilizer is dissolved. They generally have a higher stitch count for this purpose. Always read the instructions carefully to ensure that you are sewing out a freestanding lace design and are using the correct stabilizer, thread and needle recommended by the designer. There are many ways to digitize freestanding lace and it’s always best to follow the directions specific to the designs you are sewing. Each designer may be testing on different threads and stabilizers and the designs may not work on all dissolvable stabilizers. Which Water-soluble Stabilizer should you use? |
Stitching your Freestanding Lace Design
Hoop the dissolvable stabilizer as reccommended with your designs, and then stitch out the design in thread colors of your choice. Daleen recomends you use two layers of Vilene for best results. Making Multi Colored Lace Creating a Heavier Lace Look Creating a Daintier Lace Look |
Washing the Stabilizer out for the Lace. When you have finished stitching the design, cut away the excess Vilene and rinse the design under a running tap with warm water. Feel the design as you go, as you don’t want it to feel slimy – so rinse until all the slime or Vilene has been dissolved. Making Firmer Lace Making Softer Lace
|
Finishing off your Freestanding Lace Projects.
Each lace piece is finished off with a satin stitch outline. Some designs like Christmas Ornaments are ready to be used immediately. Just attach ribbon and then hang them. Multiple Piece Lace Designs. Look after your lace. |
Tips for Getting the Perfect Freestanding Lace. If your freestanding lace designs fall apart after rinsing the stabilizer, check the following. Problems with Larger Designs
Digitizing Tips for Stabilizing Freestanding Lace
Freestanding Lace designs are easy to do and you can create marvelous project with this. I promise you will be hooked on lace in future.
Warm Hugs, Daleen |
Lettering
There are three main ways you can get designs to use for lettering. Alphabet & Monogram Embroidery Designs Automatic Lettering Programs Embird Alphabets |
Alphabet & Monogram Embroidery Designs There are a large number of Monogram & Font Embroidery Designs available. Most embroidery machines, have some saved in them, or you can choose from some of the thousands available online. The fanciest lettering for monograms Amazing variety of fonts and monograms available Be familiar with multiple hooping and design placement. For best results, use the original size of the letters. |
Automatic Lettering Programs Easy to add words of your choice to designs. Very easy to convert fonts to embroidery designs. Huge choice of fonts available. Digitizing Tips for Automatic Lettering. Have you ever used automatic lettering programs to add names or text to your embroidery designs? Well, then you have probably noticed that the embroidered text sometimes does not have a nice and smooth look. This can have several reasons and, if you have editing capabilities, you can improve your lettering to make it look just right. The most common problem with keyboard-lettering is the correct distance between the letters. There are a few rules that should be considered: If two round letters follow each other, like "OO" or "OG", the distance should be very small, they should almost touch each other. The same is correct for combinations like "OT" or "LC" and so on.. If a round and a straight letter are following each other, like "IO" or "DL", the distance in between should be a little wider. The largest distance should be between two straight letters, like "IL" "HP". Another problem, that is often not resolved with automatic lettering is, that letters with roundings like C, G, J, O, Q, and U often look like they are smaller then the rest of the text. The rounding of these letters should always exceed the baseline of the text a little bit, in order to look optically correct. So, if you can, use your editing-program to move the letters to the right positions or to stretch the rounded letters to exceed the baseline a bit and receive perfect lettering. I hope this tip helps you with your lettering. Cornelia of Creative Design
All the good quality embroidery software programs, include the feature to add lettering very easily, by just typing in the letters and changing your stitch preferences. This makes it very easy to add words to your embroidery designs. You can import your embroidery design into the program, add the words of your choice, save the design and embroider it out.
Many of these Automatic Lettering programs enable you easily convert from Open Type or True Type Fonts to an embroidery design. Embird Font Engine is a very popular program to use for Automatic Lettering. If gives you many adjustable lettering parameters such as size, density, fill and outline modes as well as characters layout and deformations in Font Engine. When finished, lettering is compiled into stitches and put into Embird Editor for final adjustment and save in desired embroidery format.
Check to see if your embroidery software enables you to use True Type or Open Type Fonts. If so, you will find some True Type Fonts already on your computer under C:/Windows/Fonts folder and these can all be used with Automatic Lettering Programs like Embird Font Engine to convert to embroidery designs. You will also be able to search for True Type or Open Type Fonts online and either purchase, or download free ones, to use for your lettering. These Fonts are not embroidery designs, but are a digital font, recognized by many programs on your computer like Microsoft Word etc.
By Cornelia Dobner of Creative Designs
Embird Alphabets - The best for Small Lettering The Embird Alphabets are pre-digitized embroidery designs, but with all the scalable features of fonts available in software programs. They give you the best of both options. Test sew over 30 Alphabets before you purchase. Large range of lettering sizes. Very easy to combine and change preferences.
Adjustable Parameters of Letters:
|